Occasionally, electrical switches in our home may fail and need to be replaced. Although it may seem like a complicated task, replacing a switch is a simple repair that you can do yourself without the need to call an electrician.
In addition, by performing this task, you can save money on labor costs. However, it is important to keep in mind certain safety aspects to avoid electrical accidents.
In this article, we will show you step-by-step how to replace a switch at home, what tools you need and what precautions you should take. With this practical guide, you will be ready to perform this repair in your home safely and efficiently.
Introduction to the circuit breaker: What is it and how does it work?
The switch is an electrical device found in virtually every home, office and public place. Its primary function is to allow or interrupt the flow of electrical current to a circuit or device. In simple terms, a switch is like a faucet that controls the flow of water in a pipe. Pressing or moving the switch completes or interrupts the electrical circuit, allowing electricity to flow or stop.
There are several types of switches, with the light switch being the most common in our homes. These switches allow lights in rooms to be turned on and off, while power switches are used to turn on and off other electrical devices, such as fans, televisions and appliances.
In terms of operation, a switch works by means of an internal mechanism that controls the electrical circuit. By moving the switch to the “on” position, the two metal parts inside the switch come together, which completes the electrical circuit and allows electricity to flow. When the switch is moved to the “off” position, the two metal parts separate, which interrupts the electrical circuit and stops the flow of electricity.
It is important to note that switch can be dangerous if not handled properly. It is always advisable to turn off the power before touching or replacing a switch to avoid electrical accidents. In the following section, we will show you how to turn off the electrical power before starting the switch replacement.
Why do you need to replace a switch?
There are several reasons why you may need to replace a switch in your home. One of the most common is because the switch has stopped working properly. The switch may have worn out from use, or the internal contacts may have worn out and are not making proper contact. In some cases, the switch may have suffered some type of physical damage, such as breakage or deformation, which can also cause it to malfunction.
Another reason to replace a switch may be the need to update or change its design or functionality. For example, if you want to change the style of the switches in your home, you can replace them with more modern and aesthetically appealing models. You may also need to replace a light switch with one that includes a dimmer switch, allowing you to adjust the amount of light that enters a room.

In addition, if you are experiencing electrical problems in your home, such as power outages or short circuits, it may be necessary to check the switches and replace those that are causing problems. Electrical switches are critical elements in your home’s electrical circuit, so it is important to keep them in good working order to ensure the safety and proper functioning of your electrical devices.
Tools needed to replace a switch.
Before you begin the process of how to replace a switch in the home, it is important to have the necessary tools on hand to perform the task safely and efficiently. The tools needed are fairly simple and you probably have them in your home if you have done some repairs or DIY before.
First, you will need a screwdriver. The size of the screwdriver will depend on the type of screw holding the switch to the wall. If you’re not sure, it’s a good idea to have several sizes of screwdrivers on hand to make sure you have the right one.
You will also need a wire stripper. This type of tool is used to strip the insulation from electrical wires so you can connect them to the new switch. If you don’t have a wire stripper, you can use a sharp knife, although you should be very careful when doing so.
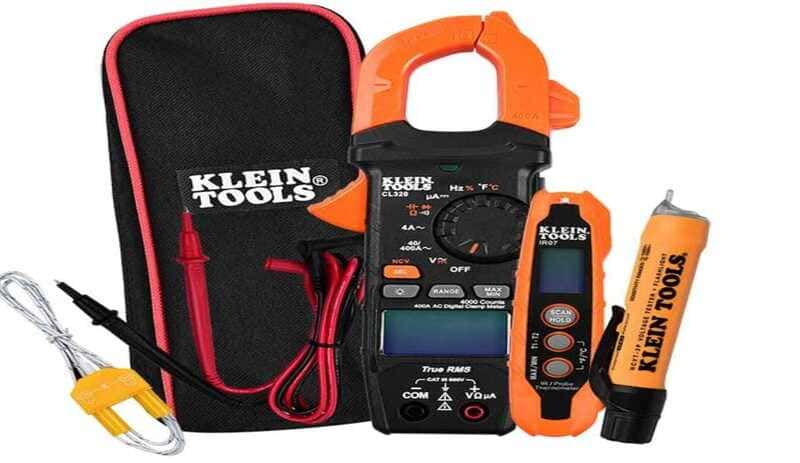
Another tool that may be useful is a voltage tester. This tool will allow you to check if there is electrical current in the circuit before you start working on it, which is important to ensure safety during the task.
In addition, it is advisable to have a flashlight or a portable lamp to be able to see in dark areas where the switch is located.
Finally, if you are replacing the switch plate, you will need a template to mark the location of the fixing screws on the wall.
How to turn off the electrical power before starting.
A vitally important step in avoiding accidents in the process of replacing a switch in the home is to de-energize the circuit. Before beginning work on the switch, it is important to make sure to turn off the power to ensure safety during the task. While it may seem obvious, many electrical accidents occur when working on an energized electrical circuit.
The first step in turning off the power is to locate the circuit breaker that supplies power to the switch you are replacing. If you are unsure, you can turn off the general power to the house, but this is not recommended, as you will turn off power to all electrical devices in the home.
Once you have identified the appropriate circuit breaker, turn it off by moving the lever to the off position. Make sure the lever is firmly in the off position, as this will prevent it from accidentally turning on while you are working on the switch.
After turning the power off, verify that the power is actually off by using a voltage tester. This type of tool will allow you to verify that there is no electrical current in the circuit, which is important to ensure your safety during the task.
How to remove the old switch.
Once you’ve turned off the power and have the necessary tools on hand, it’s time to remove the old switch.
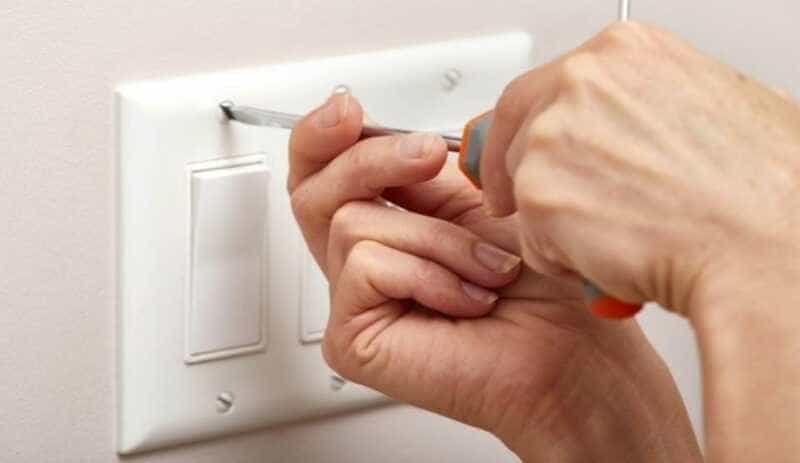
The first thing you need to do is remove the old switch plate. To do this, use a screwdriver to loosen the screws holding the plate to the wall. Once loosened, carefully remove the plate and set it aside to avoid damaging it.
Next, use the screwdriver to loosen the screws holding the old switch to the junction box. Once the screws are sufficiently loosened, gently pull on the old switch to remove it from the junction box.
Once the old switch is removed, it is time to disconnect the electrical wires that are connected to the switch. Use a wire stripper to remove the insulation from the wires that are connected to the switch. Next, loosen the screws on the switch terminals and remove the wires from the old switch.
It is important to remember which wire was connected to which terminal so that you can connect the wires to the new switch correctly. If you are not sure, you can take a picture or make a diagram of the wires before disconnecting them.
How to connect the new switch: identification of wires and their connection.
Already, in this part of the article, you have all the necessary tools for how to replace a switch in the home. Once you have removed the old switch, it is time to connect the new switch. Before you begin, it is important to identify the wires that are connected to the switch.
In most cases, switches will have two or three wires connected to them. If the switch is single pole, you will only have two wires connected to it. If the switch is two-pole, you will have three wires connected to it.
The live or phase wire is commonly identified by its color, which can be black, red or brown. This wire is connected to the power terminal of the switch. The neutral wire is identified by its white or gray color and is connected to the neutral terminal of the switch. If the switch is two-pole, the third wire may be the ground wire, which is identified by its green or yellow color with green stripes and is connected to the ground terminal of the switch.
Once you have identified the wires, it is time to connect the new switch. If the switch is single-pole, connect the live or phase wire to the power terminal of the switch and the neutral wire to the neutral terminal of the switch. If the switch is double-pole, connect the live or phase wire to the power terminal of the switch, the neutral wire to the neutral terminal of the switch and the ground wire to the ground terminal of the switch.
It is important to make sure that the wires are connected correctly and the terminals are tight. To do this, use a pair of pliers to tighten the terminal screws. Once the wires are connected correctly, place the new switch in the junction box and screw the screws to secure it in place.
Finally, put the switch plate in place and screw the screws to secure it to the wall. Turn on the power to verify that the switch is working properly.
How to test the switch after installation.
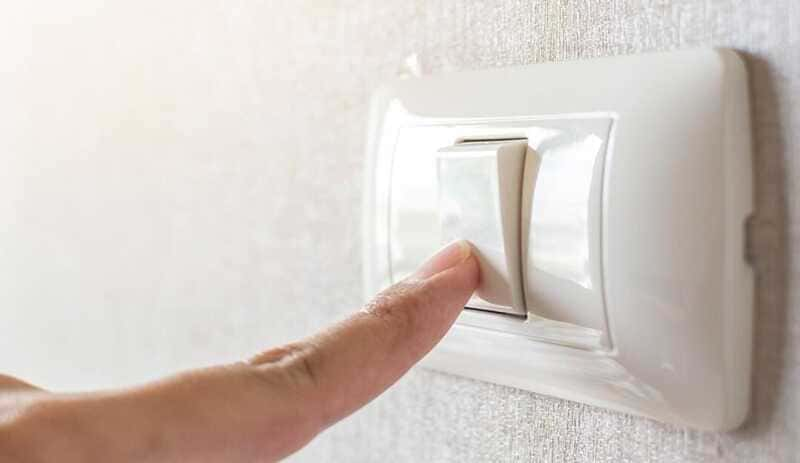
After you have installed the new switch in place, it is important to verify that it is working properly. To do this, there are a few simple tests you can perform.
First, make sure the power is on. Then, turn the switch on to verify that it turns the light on and off properly. If the switch is single-pole, the light should turn on and off when you push the switch up and down respectively. If the switch is bipolar, the light should turn on and off by pressing the switch up or down respectively.
If the light does not turn on or off properly, there could be a problem with the connection of the switch wires or with the connection of the switch in the junction box. In that case, it is advisable to turn off the power and check the switch connections to make sure they are connected correctly.
Another test you can perform is to verify that the breaker is functioning properly with a voltage tester. This device is used to check if there is electrical current in a circuit. To do this, turn off the power and unplug the breaker from the junction box. Then, with the voltage tester, verify that there is no electrical current at the terminals of the circuit breaker.
If the voltage tester indicates that there is electrical current at the switch terminals, there could be a problem with the wire connection or the junction box. If you are not sure how to troubleshoot the problem, it is advisable to contact a qualified electrician to help you solve the problem.