Tile grout is an essential component in the installation of ceramic tile surfaces. However, over time, grout can become dirty, stained and even worn, negatively affecting the appearance of our tiles and the overall ambiance of the room. Fortunately, there is a solution to this common problem: learn how to effectively remove grout from tiles and restore their original shine and appearance.
In this article, we will explore different methods and techniques that will help you how to remove grout from tiles safely and efficiently. We will provide you with a step-by-step guide, from the initial preparation to the final cleaning and maintenance steps. We’ll also highlight helpful tips, important precautions and solutions for dealing with especially difficult grout.

Whether you’re looking to revamp the look of your bathroom, kitchen or other areas of your home, or you’re simply looking to keep your tiles looking pristine, this article will provide you with the information you need to do just that – get ready to revitalize your tiles and enjoy a fresh, sparkling ambiance in your home!
Introduction to tile grout.
Tile grout is an essential component in the installation and finishing of ceramic surfaces. It is a viscous substance composed mainly of cement, sand and additives that is used to fill the joints between tiles. Its main function is to provide structural stability, improve aesthetic appearance and prevent water and dirt infiltration into the spaces between tiles.
As time passes, tile grout can accumulate dirt, stains and wear, which can significantly affect the overall appearance of ceramic surfaces. Therefore, it is important to know how to properly and effectively remove tile grout in order to restore its original shine and appearance.
Removing grout from tiles not only allows you to rejuvenate the aesthetics of the surfaces, but it is also a fundamental part of proper tile maintenance and care. By performing this process, stubborn stains, mildew and dirt buildup can be removed, ensuring a clean and attractive surface.
Tools and materials needed.
When embarking on the process of how to remove grout from tiles, it is essential to have the right tools and materials to carry out this task efficiently and safely. Below, we will list the necessary items that will allow you to tackle this task effectively.
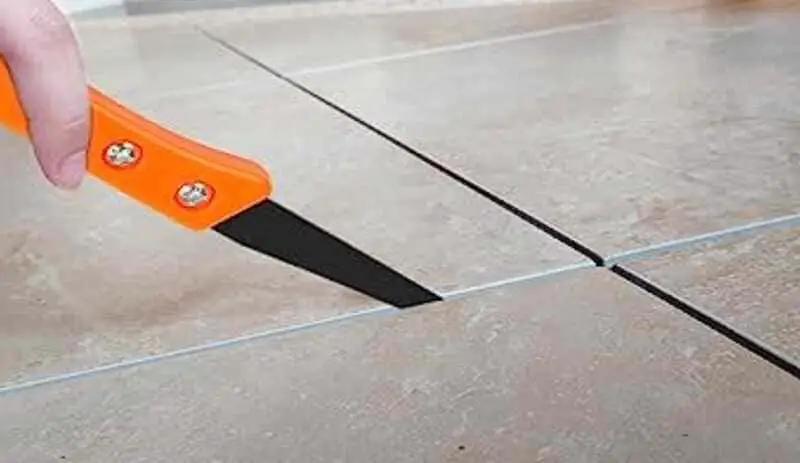
1- Grout scraper: This essential tool will allow you to scrape and remove the old grout from the spaces between the tiles. You can opt for a manual or an electric scraper, depending on the amount and difficulty of the grout to be removed.

2- Blade or cutter: A sharp blade or cutter will be useful for cutting and removing small areas of grout that are difficult to reach with the scraper. Be sure to have spare blades on hand, as they can wear out with use.
3- Personal Protection: To ensure your safety during the grout removal process, personal protective equipment is essential. This includes goggles, heavy-duty gloves, a mask or respirator and, in some cases, hearing protection.
4- Grout solvent: Depending on the amount of grout to be removed and its level of adhesion, you may need a specific solvent to loosen it and facilitate its removal. Consult the manufacturer’s recommendations and be sure to use it according to the instructions.
5- Sponges and rags: Sponges and rags will be useful for cleaning the tiles after grout removal and for removing any residue that may remain. Make sure you have enough on hand to keep the work area clean and free of stains.
6- Bucket of water: A bucket of clean water will allow you to rinse sponges and rags during the cleaning process. Be sure to have fresh water available to ensure effective cleaning.
7- Stiff bristle brush: If the grout is particularly embedded in the tiles, you may need a stiff bristle brush to scrub and remove the remaining residue.
8- Spatula: A spatula can be useful for scraping off any excess grout left on the tile surface.
Remember that the availability and use of these tools and materials will depend on the specific situation and characteristics of your tiles. Be sure to read and follow the product manufacturer’s instructions and use the proper protective equipment at all times to carry out the grout removal process on your tiles efficiently and safely.
Advance preparation.
Before embarking on the task of how to remove grout from tiles, it is crucial to carry out proper preparation to ensure a smooth and safe process. Here are the necessary steps to follow before you begin grout removal.
Protect adjacent surfaces: Before beginning the process, be sure to cover and protect any surfaces adjacent to the tiles that you don’t want to damage or stain. Use painter’s tape and protective plastic to cover the edges of neighboring tiles, countertops, furniture or any other nearby surfaces that may be exposed to splashes or scratches.
Prepare the work area: Make sure you have a clean, clear space to work in. Remove any objects or utensils that may interfere with the grout removal process and ensure easy access to the area to be treated.
Safety Equipment: Before beginning, it is essential to wear proper safety equipment. Put on safety goggles to protect your eyes from any loose particles or splashes of grout. Wear heavy-duty gloves to protect your hands from direct contact with chemicals or sharp tools. Also, if necessary, wear a respirator or mask to avoid inhaling harmful dust or fumes during the process.
Adequate ventilation: Open windows or use fans to ensure good air circulation in the area where you are working. This will help prevent dust buildup and allow for better breathing while performing the grout removal task.
Familiarize yourself with instructions and precautions: Carefully read the instructions provided by the manufacturer of the grout removal product you plan to use. Make sure you fully understand the steps to follow and the precautions necessary for safe and efficient handling.
Tips and precautions.
During the process of removing grout from tiles, it is important to keep certain tips and precautions in mind to ensure a safe and efficient job. Here are some important tips to keep in mind.
Personal protective equipment: Before you begin, be sure to wear the proper protective equipment. This includes goggles to protect your eyes from possible grout splashes, sturdy gloves to avoid cuts or irritation to your hands, and a respirator or mask to avoid inhaling dust or fumes during the process.
Adequate ventilation: It is essential to have good ventilation in the area where you are working. Open windows, turn on fans and, if possible, use an exhaust mask to ensure adequate air circulation. This will help prevent the accumulation of harmful dust and fumes, and provide you with a safer and healthier environment.
Caution with tools: When using hand scrapers or power tools, be sure to handle them with care and precision. Avoid applying too much pressure so as not to damage the surrounding tiles. If you are using power tools, follow the manufacturer’s instructions and always use the proper accessories to avoid accidental injury or damage.
Tile protection: During the grout removal process, be sure to protect the tiles to avoid scratches or damage to their surface. Use painter’s tape to cover the edges of the tiles and be sure to handle tools carefully around them.
Test in small areas: Before applying any method or product to large areas, test small, inconspicuous areas to make sure you won’t damage the tiles or adversely affect their appearance.
Regular cleaning: As you progress with grout removal, be sure to regularly clean the work area to prevent grout residue from drying out and becoming more difficult to remove.
Follow instructions: If you are using a specific grout solvent or cleaner, be sure to follow the instructions provided by the manufacturer. Use the correct amount, proper dwell time and rinse the area thoroughly after use.
Solutions for difficult grout.
Occasionally, we encounter grout that is especially difficult or stubborn to remove, which can make the process of removing grout from tile an additional challenge. Fortunately, there are solutions and alternative options that can help us tackle this problem. Here are some additional suggestions for dealing with difficult grout and alternative options in case conventional methods don’t work.
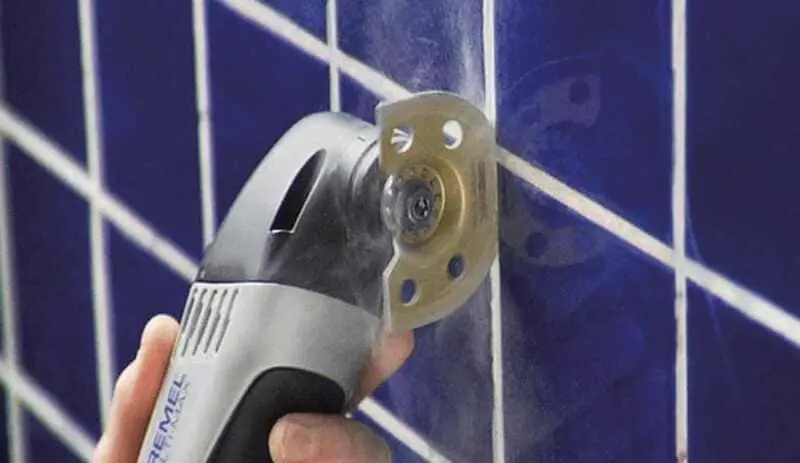
1- High-powered tools: If conventional methods are not working, you can consider using high-powered tools, such as a grinder with a diamond blade specifically designed to cut and remove grout. These tools are more aggressive and can be effective in situations where other methods fail to achieve satisfactory results. However, you must use caution to avoid damaging the tiles.
2- Grout removal laser: In extreme cases, you can opt for the use of a grout removal laser. These devices emit a high intensity laser light beam that disintegrates the grout without damaging the tiles. This option is usually used by professionals and requires specialized equipment.
3- Specialized professionals: If conventional methods and alternative solutions are not producing the desired results, it may be time to consider hiring professionals who specialize in grout removal. These experts have the right knowledge, tools and products to tackle even the most difficult cases of grout. If you decide to hire professionals, be sure to do your research and choose people with experience and good references.
It’s important to remember that no matter which solution you choose, it’s critical to follow the necessary safety precautions and use the proper protective equipment. Grout removal can be a challenging process, especially in difficult cases, so patience and persistence are key. Explore different options and, if necessary, seek professional advice to achieve the best possible results in removing grout from your tiles.
Subsequent cleaning and maintenance.
Once you have completed the process of removing grout from your tiles, it is important to perform proper cleaning and establish regular maintenance to ensure your tiles look flawless and avoid future problems. Below are instructions on how to perform the after-cleaning and tips for proper maintenance of your tiles.
After cleaning: After removing the grout, it is crucial to thoroughly clean the tiles to remove any remaining grout residue or dirt. Use a damp sponge or cloth to gently wipe the surface of the tiles, making sure to remove any loose particles. Avoid scrubbing too hard to avoid damaging the newly cleaned tiles.
Rinse: Once you have cleaned the tiles, rinse them with clean water to remove any grout or cleaning product residue. Use a clean sponge or damp cloth to make sure the tiles are completely free of any residual substances.
Drying: After rinsing, dry the tiles thoroughly with a clean, dry cloth. This will help prevent moisture buildup and staining of the tile surface.
Sealing Joints: If you want to provide additional protection and make future cleaning easier, consider sealing the tile joints with a grout-specific sealer. This will help prevent water and dirt penetration, keeping the joints clean and strong.
Regular maintenance: To keep your tiles in good condition, it is important to perform regular maintenance. Clean the tiles regularly using cleaning products suitable for tiles and avoid using abrasive cleaners that can damage the surface. Use a soft sponge or cloth to avoid scratches and gently scrub the tile surface.
Stain prevention: To avoid stains and dirt accumulation, it is advisable to clean up any spills or stains immediately. Also, avoid leaving standing water in tile joints and wipe up any liquid spills to prevent absorption into the grout.
Regular inspection: Perform periodic inspections of your tiles to identify any damage, wear or loose grout. If you detect problems, act quickly to fix them and prevent them from getting worse.
By following these after-cleaning instructions and maintaining regular care, you can enjoy clean, attractive tiles for a long time. Remember to tailor your cleaning and maintenance practices to the specific requirements of your tiles and follow the manufacturer’s recommendations for best results.
