The solar water heater is an innovative energy solution that uses solar radiation to heat water efficiently and sustainably. Thanks to its clean and environmentally friendly operation, more and more households and businesses are opting for this technology to reduce their dependence on conventional energy sources and reduce their carbon footprint.
However, to ensure optimal performance and a long service life of our solar water heater, it is essential to provide it with proper and regular maintenance. Preventive maintenance allows us to detect and fix potential problems before they become major failures, in addition to maximizing efficiency and energy savings.

In this article, we will explore in detail the best practices for solar water heater maintenance. From visual inspection to solar panel cleaning to checking key components and corrosion protection, we’ll learn the essential steps to ensure optimal performance of our system.
Whether you’re a homeowner with a solar heater installed or an industry professional looking to expand your knowledge, this guide will provide you with the knowledge you need to keep your solar heater in excellent condition and enjoy its benefits for many years to come.
Let’s start discovering how to give our solar heater the care it deserves!
Introduction to the solar water heater.
Advances in technology and growing environmental awareness have driven the use of renewable energy in our daily lives. Among these clean and sustainable energy sources, the solar water heater stands out as an efficient and environmentally friendly solution for obtaining hot water in our homes.
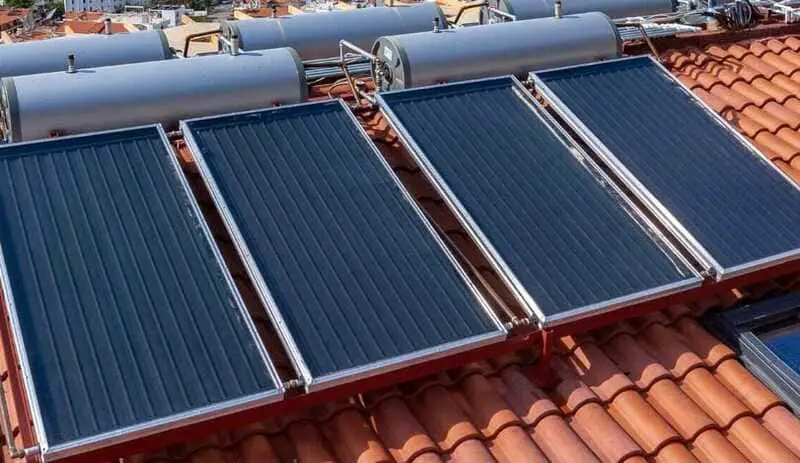
But how does a solar water heater work and why is it so important in terms of energy efficiency? Let’s start by understanding its basic operation. A solar water heater consists of three main components: solar panels, a piping system and a storage tank.
Solar panels, also known as solar collectors, are composed of a series of tubes or plates containing a heat-bearing liquid, usually water or a mixture of water and glycol. These panels are designed to capture solar radiation and convert it into thermal energy.
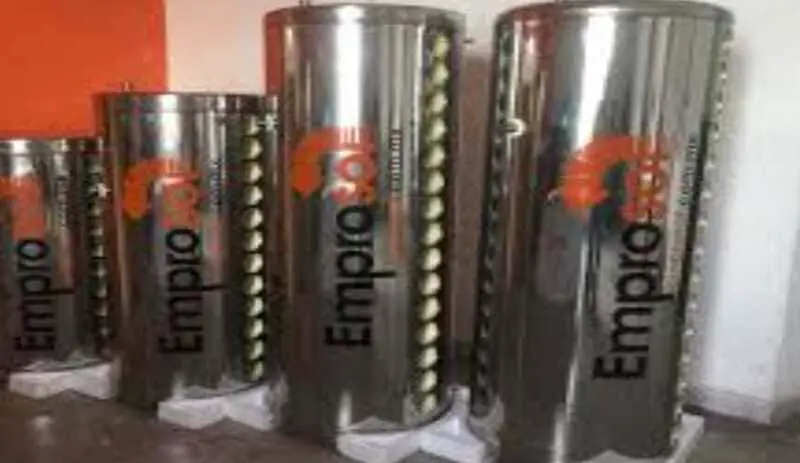
When sunlight strikes the panels, the heat-bearing liquid is heated. Through a system of pipes, the hot liquid circulates from the panels to the storage tank, where it is stored for later use. Cold water, on the other hand, enters the tank and is heated as the hot carrier liquid gives up its heat.
The importance of the solar heater in energy efficiency lies in its ability to reduce dependence on fossil fuels and thus the associated carbon emissions. By utilizing the sun’s energy, an inexhaustible and free source, we can significantly reduce our ecological footprint and contribute to environmental conservation.
However, to ensure optimal performance and prolong the life of our solar heater, proper maintenance is essential. Through a regular maintenance program, we can detect and fix potential problems, such as leaks, loose connections or worn components, thus ensuring its efficiency and continued operation.
In the following sections of this article, we will explore in detail how to maintain the solar heater. From visual inspection to cleaning the solar panels, checking key components and corrosion protection, we will discover the best practices to keep our system in excellent condition.
Visual inspection.
Visual inspection is a fundamental part of the solar water heater maintenance process, as it allows us to detect possible problems and prevent major failures. Performing this inspection regularly gives us peace of mind that our system is in good condition and working properly.
To carry out a visual inspection, it is necessary to take into account some key points. First, we must look at the solar panels. Check carefully for visible damage, such as cracks, breaks or deformations. These problems can affect the performance of the solar heater, so it is important to identify them in time.
In addition, we should check for dirt or dust accumulation on the panels. This dirt can reduce the solar radiation collection efficiency, so it is advisable to clean them regularly to ensure optimal performance.
Another important aspect to consider during the visual inspection is the connections. Examine the piping and connections of the solar heater components. Look for leaks or loose connections. If you notice any anomalies, it is essential to correct them immediately to avoid water loss or system malfunction.
In addition to the panels and connections, it is crucial to examine the storage tank. Check for signs of corrosion or deterioration in the tank. Also make sure the valves are in good condition and operational. These items are critical to the proper operation of the solar heater.
Visual inspection gives us the opportunity to detect problems at a glance, which allows us to intervene immediately and solve them before they become major failures. However, it is important to remember that visual inspection does not replace the need for regular and proper maintenance.
Solar panel cleaning.
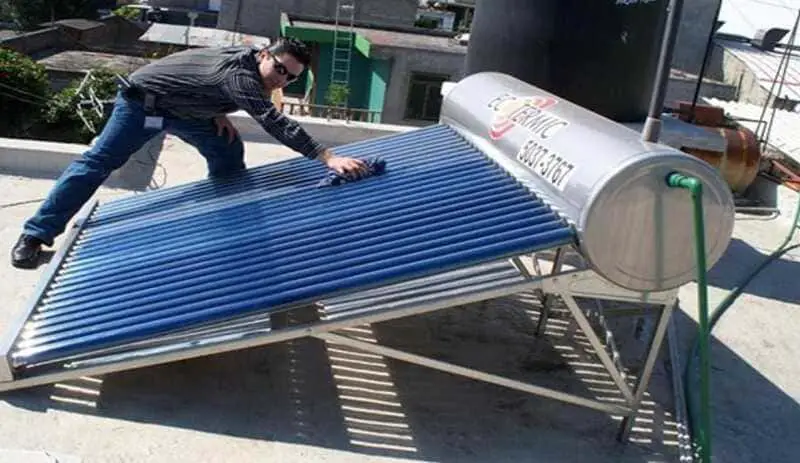
Cleaning the solar panels is an important task to maintain optimal performance in our solar heater. As the panels are exposed to the environment, it is natural for dust, dirt and other contaminants to accumulate that can affect their ability to capture solar radiation. Therefore, it is critical to perform regular cleaning to ensure that our panels operate efficiently.
Before cleaning begins, it is important to keep a few considerations in mind. First, make sure that the panels are not exposed to direct sunlight or hot to the touch. Performing the cleaning at a time of day when the panels are at a lower temperature will minimize the risk of damaging them due to sudden temperature changes.
To clean the solar panels, you will need water and mild detergents. First, you can use a garden hose to spray water on the panels to remove surface dirt. Be sure to use a gentle flow of water to avoid damaging the panels.
If the dirt persists, you can use a mild detergent mixed with water. Apply this mild detergent solution to the panels using a sponge or soft cloth. Gently wipe the surface of the panels, paying attention to areas with dirt accumulation.
Avoid using abrasive cleaners or hard brushes, as they may scratch the surface of the panels and affect their performance. It is also important to avoid using harsh chemical cleaners, as they may damage the panel materials.
Once you have cleaned the panels, rinse them with clean water to ensure that no detergent residue remains. Then allow the panels to air dry naturally before turning the system back on.
Cleaning the solar panels on a regular basis is an essential part of maintaining our solar heater. By ensuring that the panels are free of dirt and obstructions, we can ensure optimal performance and efficient collection of solar radiation.
Checking and adjusting the control system.
Checking and adjusting the control system are essential steps in the process of maintaining the solar heater. These checks allow us to ensure optimal operation of the system and maximize its energy efficiency. By checking and adjusting key parameters, such as water temperature and on/off times, we can tailor the operation of the heater to our needs and ensure efficient performance.
First, it is important to check the solar heater’s thermostat to verify the water temperature. This thermostat controls the temperature at which the water is heated by the system. Make sure it is set at a temperature that is appropriate for your needs and preferences. Remember that a setting that is too high may result in unnecessary energy consumption, while a setting that is too low may not provide sufficient hot water.
In addition, it is advisable to review and adjust the on and off times of the solar water heater. These times determine when the system turns on and off, ensuring that water is heated efficiently during periods of increased solar radiation. Check to see if these times are set correctly for your geographic location and the season of the year. You can refer to specific tables or calculations to determine the best on/off times for your area.
During the control system check, it is also important to check the sensors and connections. Make sure the sensors are in good condition and properly positioned to accurately capture temperature and solar radiation. Check that the connections are tight and free of signs of deterioration or corrosion, as loose or damaged connections can affect the operation of the system.
Once you have checked and adjusted the parameters of the control system, it is advisable to keep a record of the changes made and the results obtained. This will allow you to evaluate the performance of the solar heater over time and make additional adjustments if necessary.
Checking the pump and storage tank.
Checking the circulation pump and storage tank is an essential part of solar heater maintenance. These components play a crucial role in the proper functioning of the system, so it is important to examine them regularly to make sure they are in good condition and working properly.
Let’s start with the circulation pump. This pump is responsible for moving the heat transfer fluid from the solar panels to the storage tank, ensuring a constant and efficient flow. During the check-up, we must verify if the pump is working properly. Pay attention to any unusual noises or excessive vibrations, as these may indicate a problem with the pump. Also, make sure that the pump is free of obstructions and clean it if necessary.
If problems are found with the pump, it is important to fix them as soon as possible. If the pump is not working or malfunctioning, you can contact a solar water heater technician to make the necessary repairs. Do not attempt to repair the pump yourself if you do not have the necessary knowledge and experience, as this could further damage the system.
Continuing with the check-up, it is necessary to examine the storage tank. This tank is where the hot water generated by the solar panels is stored for later use. Check for signs of corrosion or deterioration in the tank and make sure the valves are in good condition and operational. It is also important to check the connections and make sure they are tight and leak-free.
If you find any problems with the storage tank, such as leaking or damaged valves, it is advisable to contact a professional to make the necessary repairs. Do not attempt to repair or tamper with the tank yourself, as this could result in additional damage or injury.
Checking the circulation pump and storage tank gives us the opportunity to detect potential problems and prevent major failures in our solar water heater. By keeping these components in good condition and addressing any issues in a timely manner, we can ensure efficient operation and prolong the life of the system.
Replacement of worn components.
Replacement of worn components is an essential part of solar heater maintenance, as it ensures optimal operation and prolongs the life of the solar heater. Some common components that may require replacement are gaskets, valves, and thermal insulation. Below, I’ll tell you when they need to be replaced and provide step-by-step instructions on how to perform the replacement.
1- Gaskets: Gaskets are crucial elements that prevent water leaks at the solar water heater connections. If you notice signs of deterioration in the gaskets, such as cracks, swelling or leaks, they need to be replaced. To do so, follow these steps:
a. Turn off the solar heater and close the water inlet and outlet valves.
b. Identify the gaskets that need to be replaced.
c. Remove the old gasket carefully, making sure not to damage the connections.
d. Wipe the surface of the connections with a clean cloth and make sure it is dry.
e. Install a new gasket of the proper size and material on the fitting.
f. Be sure to tighten the connections properly, without over-tightening.
2- Valves: Valves control the flow of water in the solar heater system. If you notice difficulty opening or closing a valve, or if there are visible leaks, it probably needs to be replaced. Follow these steps to do so:
a. Shut off the water supply and drain the system to avoid leaks during replacement.
b. Disassemble the old valve, using the proper tools depending on the type of valve.
c. Clean the threads and connections where the new valve will be installed.
d. Apply Teflon tape to the threads of the new valve to ensure proper sealing.
e. Install the new valve, making sure to tighten it properly without overtightening.
f. Open the water supply and verify that there are no leaks in the new valve.
3- Thermal insulation: Thermal insulation helps minimize heat loss in the solar water heater system. If you notice that the insulation is worn, damaged or missing, it needs to be replaced to maintain the efficiency of the system. Follow these steps to do so:
a. Turn off the solar heater and allow it to cool completely.
b. Remove old insulation, if present, taking care not to damage internal components.
c. Clean the surfaces where the new insulation will be applied.
d. Apply the new thermal insulation, making sure to adequately cover all exposed areas.
e. Secure the insulation with tape or clamps, according to the manufacturer’s instructions.
Remember that it is important to follow the manufacturer’s specific instructions for component replacement, as the steps may vary slightly depending on the design and model of the solar heater. If you are unsure or do not feel confident performing the replacement yourself, it is always advisable to seek the help of a solar heating system professional. Proper replacement of worn components will ensure optimal performance and longer life of your solar heater.
Preparing for winter.
Proper preparation of the solar heater for the winter months is essential to ensure optimal operation and protect against adverse weather conditions. During this season, it is important to take specific measures to drain the system and protect it against frost that can damage components. Below, I will explain how to make the proper preparation for winter.
1- Draining the system: Before the low temperatures arrive, it is important to drain the solar heater system to avoid damage caused by water freezing. Follow these steps:
a. Turn off the solar heater and disconnect any power source.
b. Close the water inlet and outlet valves to isolate the system from the water supply.
c. Locate the drain valve on the bottom of the solar heater and open it to allow the water to drain completely.
d. Make sure all water has drained out of the system before proceeding with the next steps.
e. Disconnect the water inlet and outlet hoses or pipes to allow complete draining.
f. Once the system is completely drained, secure all connections to prevent water leaks.
2- Frost protection: In addition to drainage, it is important to protect the solar heater components from freezing to prevent damage. Here are some measures you can take:
a. Wrap exposed pipes with thermal insulation to protect them against low temperatures.
b. If your solar heater has removable solar panels, it is advisable to disassemble them and store them in a safe place during the winter.
c. Cover the solar heater with an insulating cover or thermal blanket to protect it against cold and inclement weather.
d. If there are areas prone to severe freezing, consider using space heaters or space heaters to keep the system at a safe temperature.
Remember that it is important to consult the manufacturer’s specific instructions for winterizing your solar heater, as the steps may vary depending on the model and design of the system. If you are unsure or do not feel confident performing these tasks on your own, it is always advisable to seek the help of a solar heating system professional. With proper winterization, you will be able to protect your solar heater and ensure its efficient operation when the colder season arrives.
