Access to clean, safe water is essential to maintaining a healthy life. Although the drinking water supply in many areas meets quality standards, there may still be impurities and contaminants present. This is where the installation of an in-sink water filter becomes a practical and effective solution. This device allows for the removal of a wide range of undesirable substances, such as sediment, chlorine, heavy metals and chemicals, providing a cleaner and healthier water supply for drinking and cooking.
In this article, we will explore the process of how to install a water filter in the sink in a simple and accessible way for everyone. We will look at the benefits of having a water filter in the home, the different types of filters available on the market, and how to assess the water quality in your home. In addition, we will guide you step-by-step through the installation of the filter, from preparing the sink and plumbing to the proper connection to the supply system. We will also address regular filter maintenance and provide additional tips for effective use.

If you want to enjoy purer water and improve your family’s quality of life, this article will provide you with the knowledge you need to successfully install a water filter at your sink. Let’s get started!
Introduction to the importance of water filtration in the home.
Access to clean, safe water is essential to preserving our health and well-being. Although in many regions the water supply meets quality standards, impurities and contaminants may still be present that can affect the purity of the water we consume and use in our daily activities. That is why having a water filtration system in the home is becoming increasingly important.
Tap water can contain sediment, chlorine, heavy metals and other chemicals that not only alter its taste and odor, but can also pose long-term health risks. In addition, these substances can affect the quality and taste of the food and beverages we prepare in our kitchen.
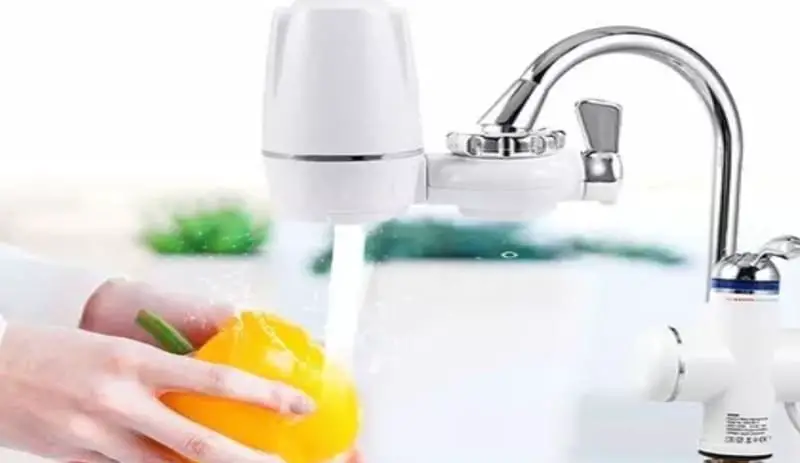
It is in this context that the need arises to install a water filter in the sink. This device is responsible for removing much of the impurities and contaminants present in the water, providing a cleaner, clearer and healthier water supply for drinking, cooking and washing food.
By installing a water filter at the sink, you can have peace of mind that you are taking concrete steps to protect your family’s health. In addition, having filtered water at home means reducing the consumption of bottled water, which is not only more economical, but also beneficial to the environment by reducing the generation of plastic waste.
How to install a water filter at the sink will become a simple and valuable task to ensure that your family has access to purer and healthier water. Read on and find out how to do it!
Benefits of installing a water filter in the sink.
The process of how to install a water filter in the sink can make a big difference in the quality of the water we consume and use in our home. This simple device offers a number of significant benefits that improve our health, well-being and daily comfort.
First, the in-sink water filter removes a wide range of impurities and contaminants present in the water supply. This includes sediment, chlorine, heavy metals, chemicals and other unwanted elements. By filtering out these substances, the water becomes fresher and more pleasant tasting, free of unpleasant odors.
In addition to improving taste, the water filter also contributes to our family’s health. By removing substances such as chlorine and chemicals, the potential long-term health risks associated with drinking water are reduced. Also, by removing sediment and particulates, the filter helps keep water clear and free of visible impurities, providing a sense of confidence and security when drinking it.
Another important benefit is the convenience and cost savings of installing a water filter at the sink. Instead of relying on bottled water, you can enjoy a constant supply of filtered water straight from the tap. This is not only more convenient, but also represents a considerable savings in the long run. In addition, by reducing the need to buy and dispose of plastic bottles, you contribute to the preservation of the environment.
Installing a water filter in the sink is a simple and accessible process that does not require specialized knowledge. In addition, there are different types of filters available on the market, adapted to the needs and preferences of each household. From activated carbon filtration systems to reverse osmosis filters, there are options to meet various requirements.
Types of water filters available for the sink.
There are several types of water filters available for sink installation, each with different characteristics and filtering capabilities. Choosing the right filter will depend on your specific needs and the water supply conditions in your area.
One of the most common types of sink water filters is the activated carbon filter. This filter uses a porous activated carbon media that absorbs and retains chemicals, such as chlorine, organic compounds and some heavy metals. The activated carbon filter is effective in improving taste and removing unpleasant odors from water.
Another option is the sediment filter. This type of filter uses a mesh or cartridge to retain solid particles and suspended sediments in the water, such as sand, mud and rust. The sediment filter is particularly useful in areas where the water has a high concentration of visible particles.
For more advanced filtration, you can consider reverse osmosis filters. These systems use a semi-permeable membrane to remove a wide range of contaminants, including sediment, chlorine, heavy metals, chemicals, bacteria and viruses. The reverse osmosis process is highly effective, providing high quality filtered water.
In addition to the filters mentioned above, there are also UV filters that use ultraviolet radiation to remove bacteria and other microorganisms from the water, and ceramic filters that retain particles and microorganisms. These types of filters can be used individually or combined with other systems to obtain a more complete filtration.
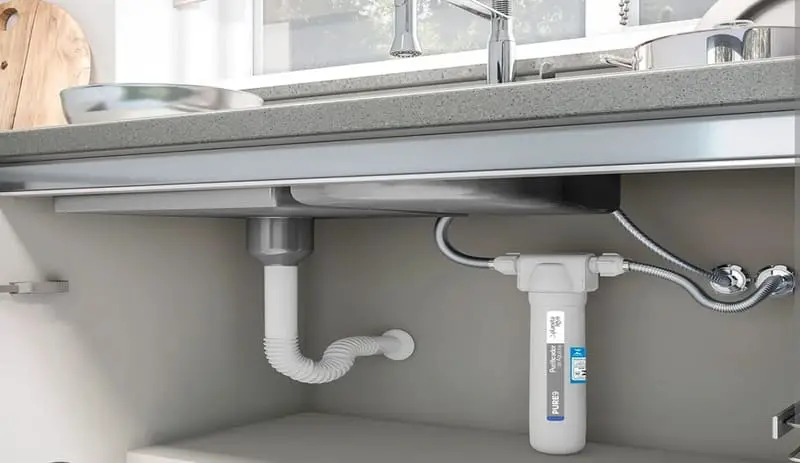
The installation of a water filter at the sink will depend on the type of filter you choose. Some filters are installed directly on the faucet, replacing the existing nozzle, while others require the installation of a separate unit under the sink. In both cases, it is important to follow the manufacturer’s instructions and be sure to make the proper connections to avoid leaks and ensure optimal performance.
Tools and materials needed for installation.
To successfully complete the task of how to install a water filter in the sink, it is important to have the right tools and materials. Below, I will provide you with a list of the essential items you will need to complete the installation efficiently.
1- Wrench or adjustable pliers: These tools will be necessary to loosen and tighten the pipe connections.
2- Screwdriver: This can be useful for disassembling or adjusting components of the existing faucet, if necessary.
3- Teflon tape: Also known as sealing tape, it is used to wrap the threads of pipe connections to prevent leaks.
4- Flexible tubing: You may need flexible tubing to make connections between the faucet or adapter and the water filter.
5- Adapter or special faucet: Depending on the type of water filter you choose; you may need an adapter or special faucet to install the filter in the sink. Check the manufacturer’s instructions to determine if you need any additional components.
6- Plumber’s wrench set: In case you need to disconnect or tighten existing plumbing connections, a plumber’s wrench set may come in handy.
7- Cloth or towels: Have cloths or towels on hand to wipe up any water spills during installation and perform a final cleanup.
Remember that specific materials and tools may vary depending on the type of water filter you choose and the characteristics of your plumbing system. Be sure to read the manufacturer’s instructions and check if any additional components or tools are required.
Steps prior to water filter installation.
Before you begin your water filter installation at the sink, it’s important to take a few preliminary steps to make sure you’re properly prepared. These preliminary steps will help ensure a smooth and successful installation.
First, familiarize yourself with the instructions provided by the water filter manufacturer. These instructions will guide you through the installation process specific to the filter model you have purchased. Make sure you fully understand the steps and requirements before you begin.
Next, make sure you have all the tools and materials needed for installation, such as a wrench, Teflon tape, flexible tubing and any required adapters or special taps. Make sure you have everything on hand to avoid interruptions during the process.
Before disconnecting any existing components, turn off the main water supply stopcock. This will prevent leaks or flooding during installation. Also, be sure to have cloths or towels on hand to wipe up any water spills during the process.
It is advisable to carefully examine the area where the water filter will be installed. Make sure there is enough room under the sink to place the filter and make the necessary connections. If necessary, clear the area of objects or utensils for easy access.
It is also important to evaluate the existing plumbing system. Identify the hot and cold water connections under the sink, as well as the type of faucet or adapter that is currently installed. This information will help you determine the proper method for connecting the water filter.
Finally, it is a good practice to perform an initial assessment of the water quality in your home. This may involve laboratory testing or the use of commercially available water testing kits. Understanding the water quality beforehand will allow you to select the most appropriate water filter for your needs.
Preparing the sink and plumbing for installation.
Before proceeding with the installation of the water filter in the sink, it is important to properly prepare both the sink and the surrounding plumbing. These preliminary steps will ensure a smooth and efficient installation process.
Begin by cleaning and clearing the sink area. Remove all utensils and objects that may obstruct access and make sure you have plenty of working space. Next, wash the sink thoroughly, making sure to remove any debris, grease or obstructions that may interfere with the installation.
Next, turn off the main water supply stopcock to prevent leaks during the installation process. This will ensure that there is no water flow while you are working on the plumbing.
Once the faucet is turned off, open the sink faucets to allow the remaining water in the pipes to drain completely. This will help prevent unnecessary splashing or spills during installation.
Before proceeding, inspect the existing plumbing for any leaks or damage. If you notice any irregularities, it is advisable to address them before installing the water filter. Also make sure that the pipe connections are tight and leak-free.
In some cases, you may need to disconnect the existing faucet to install the water filter. To do this, use a wrench or adjustable pliers to loosen the pipe connections. Have a container or towels handy to catch any residual water that may spill during this process.
Once you have properly prepared the sink and plumbing, you are ready to move on to the next stage of installation. Remember to follow the water filter manufacturer’s instructions and use the proper tools and materials for a successful installation.
Installing the faucet or adapter needed for the filter.
Once you have done the proper preparation of the sink and plumbing, it is time to install the faucet or adapter needed for the water filter. This step is crucial to ensure a proper connection between the filter and the water supply.
Start by reviewing the instructions provided by the water filter manufacturer. These instructions will guide you on the type of faucet or adapter required and the specific steps for installation.
If you need to replace the existing faucet, be sure to follow the directions provided. Disassemble the old faucet using the appropriate tools, such as a screwdriver or wrench. Be careful when handling the components and store them in a safe place in case you need to use them again in the future.
Clean the area where the new faucet or adapter will be placed to ensure a clean, unobstructed surface. Remove any debris or dirt that has accumulated at the base of the sink.
If the water filter comes with an adapter, follow the instructions for proper installation. Make sure it is tight and properly sealed with Teflon tape on the threads to prevent leaks.
If a new faucet needs to be installed, follow the manufacturer’s instructions. Use the proper tools to tighten the connections to make sure they are tight and leak-free. Apply Teflon tape to the threads of the connections to ensure a tight seal.
Once you have installed the faucet or adapter, check that it is in the correct position and functioning properly. Open the main water supply stopcock and test the new faucet to make sure the water flows properly and without leaks.
If you notice any leaks, turn off the main stopcock and check the connections again. Adjust the connections as necessary and retest to confirm that there are no leaks.
Connecting the water filter to the water supply system.
Once you have installed the necessary faucet or adapter for the water filter at the sink, the next step is to connect the filter to the water supply system. This connection is critical to ensure that the water flowing through the filter is properly filtered before it reaches the faucet.
Before you begin, make sure you have all the necessary components and fittings on hand according to the water filter manufacturer’s instructions. This may include flexible tubing, adapters and connection gaskets.
First, check the water filter connections. Depending on the type of filter you purchased, you may need to make different connections. Some filters connect directly to the faucet, while others require the installation of a separate unit under the sink.
If the water filter connects directly to the faucet, be sure to follow the instructions provided by the manufacturer. Connect the hoses to the designated outlets on the filter and to the faucet, using the appropriate connection joints. Be sure to tighten the connections securely to prevent leaks.
If the water filter requires the installation of a separate unit under the sink, follow the manufacturer’s instructions for locating the unit in a suitable location. Make inlet and outlet connections using the flexible tubing and adapters provided. Be sure to tighten all connections securely.
During connection of the water filter, it is important to note the direction of water flow. Be sure to follow the direction arrows indicated on the filter to ensure that the water flows in the correct direction through the filter system.
Once you have made all the connections, check that they are tight and sealed properly. Open the main water supply stopcock and check for any leaks at the connections. If you detect any leaks, turn off the stopcock and tighten the connections as necessary.
Once the connections are tight and leak-free, turn on the main stopcock and test the operation of the water filter. Turn on the faucet and run the water to make sure it flows properly through the filter and comes out clean and filtered.
Functional testing and checking the quality of the filtered water.
Once you have connected the water filter to the water supply system and completed the installation, it is important to perform performance tests and check the quality of the filtered water. These tests will allow you to make sure that the filter is operating properly and that you are getting quality filtered water in your home.
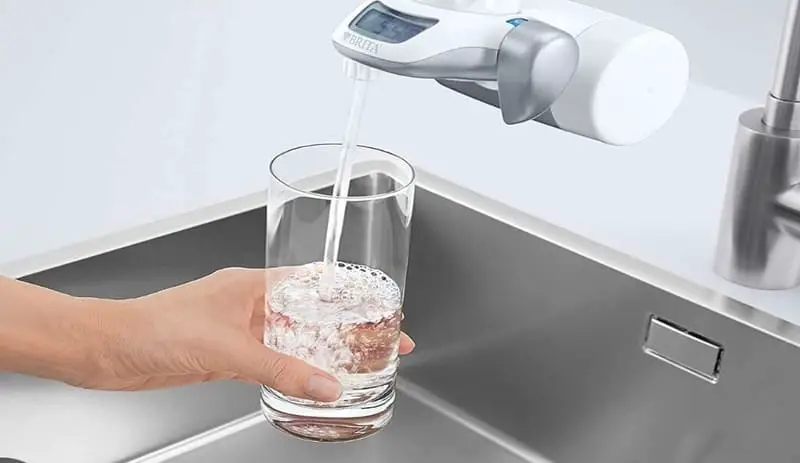
To perform the function tests, turn on the faucet and run the water through the filter. Observe the water flow and make sure there are no leaks at the connections. The filtered water should flow steadily and without interruption.
It is also advisable to check the water pressure. If you notice a significant drop in pressure after installing the filter, you may need to make adjustments to the connections or refer to the manufacturer’s instructions to ensure that the filter is installed correctly.
Once you have confirmed that the filter is functioning properly, it is time to check the quality of the filtered water. You can do this through different methods, such as laboratory analysis or commercially available water testing kits.
If you opt for a laboratory analysis, collect a sample of filtered water from your tap and send it to a specialized laboratory. The analysis will reveal the quality of the water in terms of substances, minerals or contaminants present. Consult with the laboratory about the specifications you wish to test the filtered water for.
If you prefer to test at home, use a water testing kit and follow the instructions provided. These kits often provide quality indicators for different substances, such as chlorine, lead, bacteria and other common contaminants. Follow the kit instructions and compare the results to acceptable drinking water quality limits.
Remember that water quality may vary depending on geographic location and characteristics of the local water supply. When performing quality tests, be sure to take into account the standards and regulations set by local authorities.
If the test results indicate an improvement in the quality of the filtered water, you can be sure that the filter installation has been successful. Enjoy the benefits of having filtered water in your home, both for drinking and cooking.
