If you have a cluttered and disorganized closet, installing shelves can be the perfect solution to make the most of your storage space. Shelving can provide an efficient way to organize your clothes, shoes and accessories, allowing you to find everything you need quickly and stress-free.
However, to install shelving effectively, you need some tools and a little bit of know-how. In this article, we’ll provide you with a comprehensive guide on how to install closet shelving, which will address everything from the types of shelving available to the tools needed to get the job done.
Read on to discover how to transform your closet into an organized and functional space with the installation of shelving.
Types of closet shelving: shelves, drawers, rods, etc.
Shelving is a great way to maximize the storage space in your closet, but do you know what are the different types of shelving that exist? Here we tell you everything you need to know.
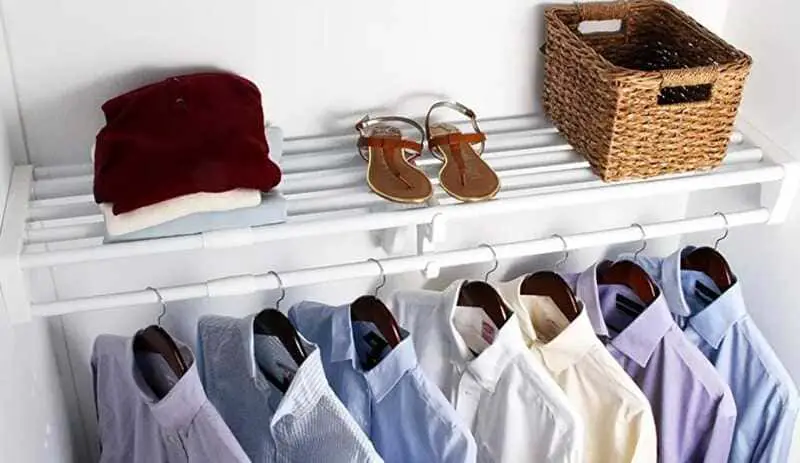
First, shelves are a popular choice for closets. They can be adjustable to fit your storage needs and provide a place to store larger items, such as bags or boxes.
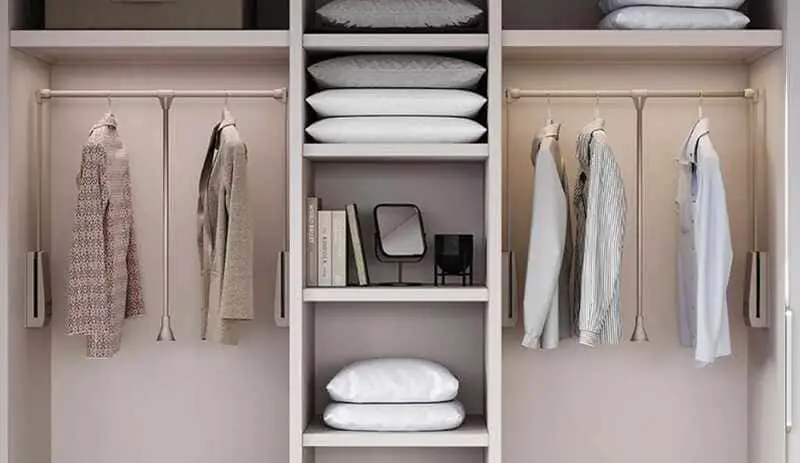
Drawers are also an excellent choice for underwear and sock storage. They can be built in a variety of sizes and can be customized to fit your specific needs.
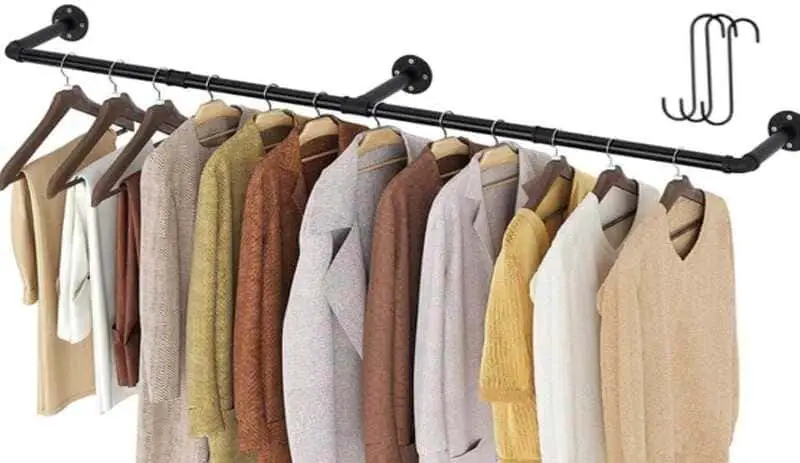
Garment hanging bars are another popular option. They can be adjusted in height and provide an easy way to hang jackets, coats and dresses.
Finally, shoe racks are a great way to organize your shoes. They can be adjustable and provide a convenient place to store your shoes.
Now that you know the different types of closet shelving, it’s time to start installing them. Follow our complete guide on how to install closet shelving for the best results.
Tools needed for closet shelving installation.
Before you begin the process of how to install shelving in closets, it is important to make sure you have all the necessary tools on hand. Depending on the type of shelving you are installing, the tools needed may vary. Here is a list of the most common tools needed for closet shelving installation.
First, a power drill is a must-have tool for most shelving installation projects. It is used to drill holes for screws and other fasteners. You will also need screws, nails, staples or any other fasteners you will be using to secure the shelves in place.
In addition, a level is essential to ensure that the shelves are level and look good once they are installed. A tape measure and pencil are useful for marking the positions of the shelves and measuring the distances between them.
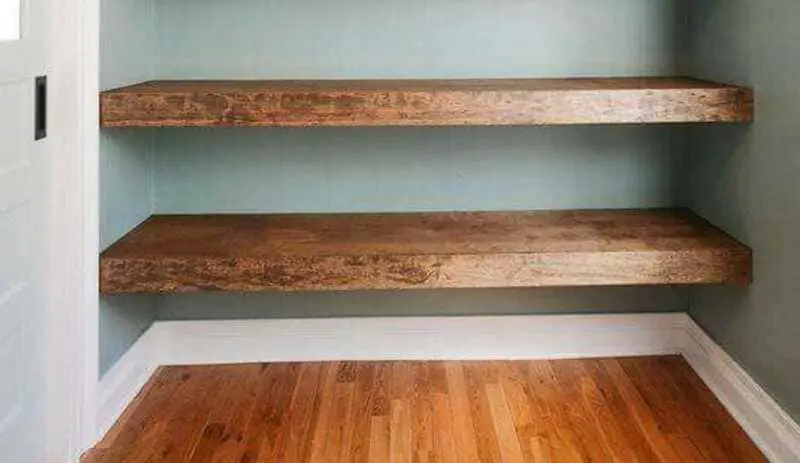
Finally, you may need additional tools depending on the type of shelving you are installing. For example, if you are installing wood shelving, you may need a saw to cut the wood to size. If you are installing shelving with drawers, you may need a wrench to secure the drawer rails in place.
Now that you have an idea of the tools you need for closet shelving installation, it’s time to get started. Make sure you have everything you need on hand before you begin and follow our step-by-step instructions for the best results.
Tools needed for closet shelving installation.
Before you begin the process of how to install shelving in closets, it is important to make sure you have all the necessary tools on hand. Depending on the type of shelving you are installing, the tools needed may vary. Here is a list of the most common tools needed for closet shelving installation.
First, a power drill is a must-have tool for most shelving installation projects. It is used to drill holes for screws and other fasteners. You will also need screws, nails, staples or any other fasteners you will be using to secure the shelves in place.
In addition, a level is essential to ensure that the shelves are level and look good once they are installed. A tape measure and pencil are useful for marking the positions of the shelves and measuring the distances between them.
Finally, you may need additional tools depending on the type of shelving you are installing. For example, if you are installing wood shelving, you may need a saw to cut the wood to size. If you are installing shelving with drawers, you may need a wrench to secure the drawer rails in place.
Now that you have an idea of the tools you need for closet shelving installation, it’s time to get started. Make sure you have everything you need on hand before you begin and follow our step-by-step instructions for the best results.
How to properly measure closet space for shelving installation.
Proper measurement of closet space is essential to ensure that shelving will fit perfectly. Here’s how to properly measure closet space for shelving installation.
The first thing you should do is measure the height of the closet. To do this, use a tape measure and measure the distance from the floor to the top of the closet. It is important to measure at several different points in the closet, as the walls may not be perfectly straight. Take note of the lowest measurement and use this as a reference for the height of the shelves.
Next, measure the width of the closet. To do this, use a tape measure and measure the distance from the left wall to the right wall of the closet. Again, it is important to measure at several different points in the closet to get an accurate measurement. Take note of the widest measurement and use this as a reference for the width of the shelves.
Finally, measure the depth of the closet. To do this, use a tape measure and measure the distance from the back wall of the closet to the front door. It is important to measure at several different points in the closet to get an accurate measurement. Take note of the deepest measurement and use this as a reference for the depth of the shelves.
It is important to take into account any obstacles in the closet, such as pipes or baseboards, when measuring. Be sure to measure around these obstacles to get an accurate measurement.
Once you’ve measured the closet space, it’s time to determine what type of shelving will fit best. Be sure to choose shelving that will fit the closet space, taking into account the measurements you’ve taken.
Safety considerations when installing shelving.
Installing closet shelving can be an exciting project, but it’s also important to keep safety considerations in mind. Here’s what you need to know to make sure your shelving installation is safe.
The first thing you should do is make sure you have the right tools. Use high-quality tools and make sure they are in good condition. If the tools are damaged or in poor condition, they can cause accidents.
Before starting the installation, make sure the work area is clear and free of obstacles. Remove anything that may hinder the installation, such as electrical cables, carpets or furniture.
It is important to consider the weight that the shelves can support. Make sure the shelving is designed to support the weight of the items that will be stored on it. Do not overload the shelves, as this can cause them to sag.
Make sure the shelving is installed correctly. Follow the manufacturer’s instructions and make sure the shelves are securely fastened to the wall. Use the proper screws and anchors and make sure they are in the correct position.
It is important to consider the height of the shelves. Make sure the shelves are installed at a safe and accessible height. Avoid placing heavy or fragile items on shelves that are too high or difficult to reach.
Finally, make sure the work area is well lit. If the work area is dark, it is more difficult to see what you are doing and increases the risk of accidents.
The task of how to install closet shelving can be an exciting project, but it’s also important to keep safety considerations in mind. By following these tips, you can ensure that your shelving installation is safe and secure.
How to install shelving in dry wall closets.
Installing shelving in dry wall closets can be a simple task if you have the right tools and knowledge. Here are some tips on how to install shelving in dry wall closets.
The first thing you should do is measure the available space in the closet. Take exact measurements of the length and height of the wall where you want to install the shelves. This will help you determine the size of shelving you need.
Once you have the measurements, make sure you have the right tools for the installation. You will need a drill bit, screwdriver, screws and dry wall anchors. It is also advisable to have a spirit level to make sure the shelves are level.
Before beginning installation, make sure the wall is clear and clean. Use a stud finder to locate the studs behind the wall. Once you have found them, mark their location with a pencil.
Use the drill bit to drill holes in the wall where you have marked the studs. Insert the drywall anchors into the holes and make sure they fit snugly. Then screw the shelf brackets into the anchors.
Place the shelves on the brackets and make sure they are level using a spirit level. Screw the shelves to the brackets with the appropriate screws.
Finally, check that the shelves are firmly attached to the wall and do not wobble. Make sure the shelves are installed at the proper height and are safe for storing your belongings.
How to install shelving in concrete wall closets.
Installing shelving in concrete-walled closets can be a little more complicated than drywall, but with the right tools and a little patience, you’ll be able to do it without a problem. Here are some tips on how to install shelving in closets with concrete walls.
Before you start the installation, make sure you have the right tools. You will need a drill with concrete bits, screws and concrete anchors. It is also advisable to have a spirit level to make sure the shelves are level.
The first thing you should do is measure the available space in the closet. Take exact measurements of the length and height of the wall where you want to install the shelves. This will help you determine the size of shelving you need.
Once you have the measurements, use a metal detector to locate the steel reinforcements inside the wall. Mark their location with a pencil.
Use the drill with the appropriate concrete drill bit to drill holes in the wall at the points where you have marked the steel reinforcements. Insert the concrete anchors into the holes and make sure they fit snugly.
Place the shelf brackets over the anchors and screw in the appropriate screws to secure them. Then place the shelves on the brackets and make sure they are level using a spirit level. Screw the shelves to the brackets with the appropriate screws.
Finally, check that the shelves are firmly attached to the wall and do not wobble. Make sure the shelves are installed at the proper height and are safe for storing your belongings.
How to level shelving to prevent it from wobbling.
When it comes to installing shelving, it’s important to make sure it’s level to prevent it from wobbling and risking falling or breaking. Here are some tips on how to effectively level shelving.
The first thing you should do is find a level surface where you can work. If you are installing shelving on a wall, make sure the wall is level before you begin installation. If you are installing freestanding shelves, use a spirit level to make sure the base of the shelves is level before you start placing the shelves.
Once you have verified that the surface you will be working on is level, position the shelf supports at the appropriate height and screw them into place. Make sure the brackets are level using the spirit level.
Place the shelves on the brackets and check that they are level. If one of the shelves is tilted, place a wedge under one end of the shelf until it is level. If the shelf is made up of several shelves, repeat this process with each shelf until they are all level.
Once you have leveled all the shelves, check that the shelf as a whole is level. If not, place a wedge under one end of the shelf until it is level.
Finally, check that the shelf is securely fastened to the wall or floor. Use the proper screws and anchors to ensure that the shelf is securely fastened and does not wobble.
Tips for closet shelving organization.
Shelving is an excellent option for organizing your closets and keeping your belongings in order and within reach. Here are some tips to organize your shelves effectively.
The first thing you should do is classify your belongings. Separate clothes, shoes, accessories and other items by category so you can organize them more effectively on your shelves.
Once you’ve sorted your belongings, use boxes, baskets or garbage cans to store small items such as socks, underwear and accessories. Label the garbage cans so you can find what you need quickly.
Organize your items by use and frequency of use. Place the items you use most often on the lower shelves or at eye level so you can access them easily. Items you use less frequently can be stored on upper shelves or in labeled containers and stored on lower shelves.
Use shelf dividers to divide the space and keep your items tidy. Dividers allow you to create sections for different categories of items, making it easier to find what you need.
Finally, use the “one item in, one item out” rule. Whenever you add an item to your shelves, be sure to remove another item that you no longer need or don’t use as often. This will help you keep your shelves organized and avoid accumulating unnecessary items.