Interior decorating is one of the most effective ways to transform a space in the home and give it a personalized touch. One way to add style and elegance to rooms is through the installation of cornices. Cornices are decorative elements that are placed on top of walls or ceilings that can make a room look more finished and sophisticated.
However, installing a cornice can seem like a complicated task if you are not experienced in handyman work. In this article, we’ll show you how to install cornices in the home the easy way, so you can achieve a unique and elegant look in your living space.
From the materials and tools needed to tips and tricks for a perfect installation, this article will provide you with all the information you need so you can start beautifying your home with cornice installation.
What are cornices and why are they important in home decor?
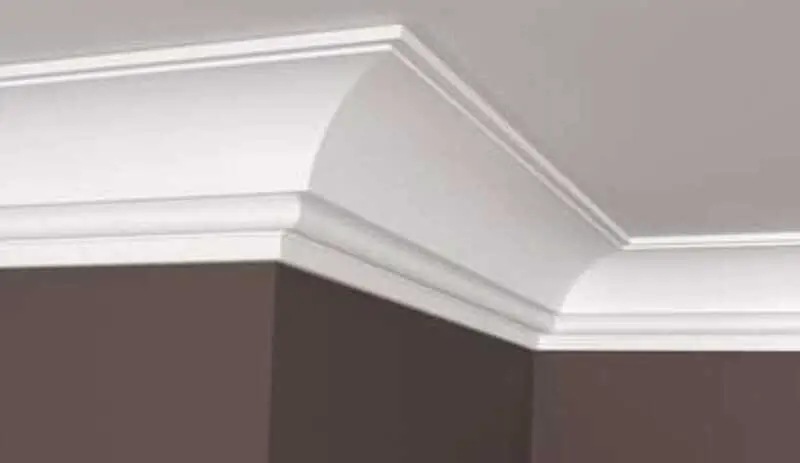
Cornices are decorative elements that are used on top of walls or ceilings to add style and elegance to a room. They are moldings that are placed at the joint between the wall and the ceiling, and can come in different shapes and sizes. Cornices can be made of different materials, such as wood, plaster, polyurethane or PVC, and each offers different advantages in terms of cost, strength and aesthetic appearance.
One of the reasons cornices are important in home decoration is because they can hide defects at the junction between the ceiling and walls, such as cracks or unevenness. In addition, cornices can help a room look taller as the eye is directed upward, and they can be a great way to add depth to a wall that would otherwise appear flat and lifeless.
The process of how to install cornices in the home may seem like a difficult task, but with the right tools and by following a few tips, it can be a very simple task. It is important to properly measure the room and plan the installation before starting, to make sure the cornices will fit perfectly. It is also essential to consider the material of the cornices and the tools needed for installation, such as special cornice glue, saws, chisels and hammers.
Types of cornices: ceiling moldings, wall cornices, window cornices.
There are different types of cornices that can be used to decorate the home. One of the most common are ceiling moldings, which are installed in the joint between the wall and the ceiling and can be of different sizes and shapes. These moldings can be very simple or very elaborate, depending on the decorative style of the room.
Another type of cornice is wall cornices, which are installed at the top of the wall, just below the ceiling. These cornices can be straight or curved, and can have different sizes and designs, depending on the room in which they are to be installed. Wall cornices are ideal for making a room look taller and more elegant.
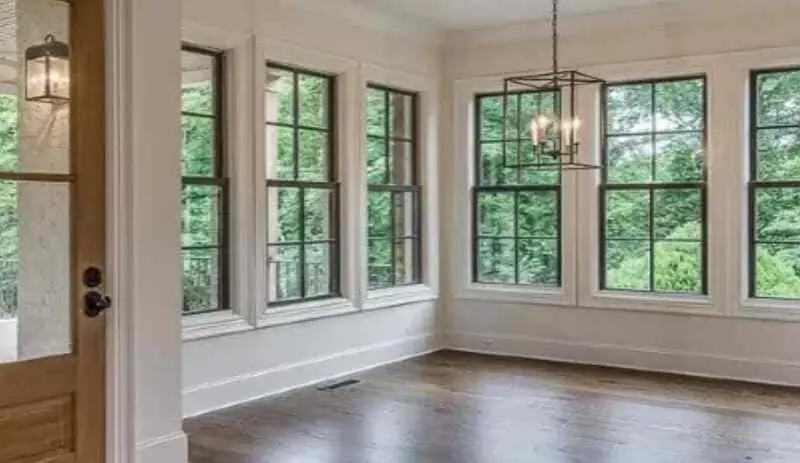
Finally, there are window cornices, which are installed at the top of the window to create a more elaborate and sophisticated look. These cornices can be very simple or very detailed, and can be a great way to add depth and texture to a room.
Tools and materials needed to install a cornice.
Before you begin the task of how to install cornices in the home, it is important to make sure you have the right tools and materials for the job. In general, the tools needed include a saw, chisels, a hammer, a level and a cornice glue gun. In addition, the materials for the cornice installation will be needed, such as the cornice itself, reinforcing strips, cornice glue and caulk to fill the joints.
One of the most important tools for cornice installation is a saw, which is used to cut the cornice to the desired length. It is important to choose a saw that has a thin, sharp blade so that the cuts are precise and clean.
Chisels and a hammer will also be needed to adjust the cornice to the proper size and to cut the corner joints. The chisel is used to remove any leftover cornice that may have been left over after the sawing.
The level is another important tool to ensure that the cornice is installed in a straight line and has a uniform appearance. It is essential to measure the room accurately before beginning to install the cornice to ensure that the length of the cornice is correct and that it fits snugly against the wall.
Finally, a cornice glue gun will be needed, which is used to adhere the cornice to the wall or ceiling. It is important to choose a special cornice glue, as these products are specifically designed to ensure a durable and strong bond.
How to measure and plan the installation of a cornice.
Another action to consider in the process of how to install cornices in the home is to measure and plan the installation properly. Otherwise, it can be difficult to achieve a uniform and professional look.
To begin, it is important to measure the room accurately to determine the amount of cornice that will be needed. Be sure to measure the length of each wall and note the measurements on a piece of paper. It is advisable to add an additional 10% to the amount of cornice needed to account for any errors or waste.
Once you have the measurements, it is important to plan the installation of the cornice. The height at which the cornice will be installed should be determined, which will depend on the size of the room and the height of the ceiling. If a uniform appearance is desired, make sure the height is the same throughout the room.
It is advisable to test a piece of cornice before beginning the installation. This will allow any necessary adjustments to be made before beginning the full installation.
Once the measurements have been taken and the installation has been planned, it is important to make sure you have all the necessary tools and materials. A saw is needed to cut the cornice to the proper length, a level to make sure the cornice is straight and a special cornice glue.
Preparation of the wall or ceiling prior to installation.
Proper preparation of the wall or ceiling prior to installing a cornice is essential for a successful and durable installation. Before beginning the installation, it is important to make sure the surface is clean, dry and free of dust and grease.
If the wall or ceiling is freshly painted, it is advisable to wait at least 24 hours before beginning the installation of the cornice. Otherwise, the glue will not adhere properly and the cornice may fall off.
Before installing the cornice, the surface should be sanded to make sure it is smooth and even. If the wall or ceiling is very uneven, it may be necessary to apply a coat of caulk to level the surface. Once the putty is dry, it can be sanded to a uniform surface.
It is important to note the location of light switches and electrical outlets when installing the cornice. The location of these features on the wall should be measured and marked to ensure that the cornice will fit properly.
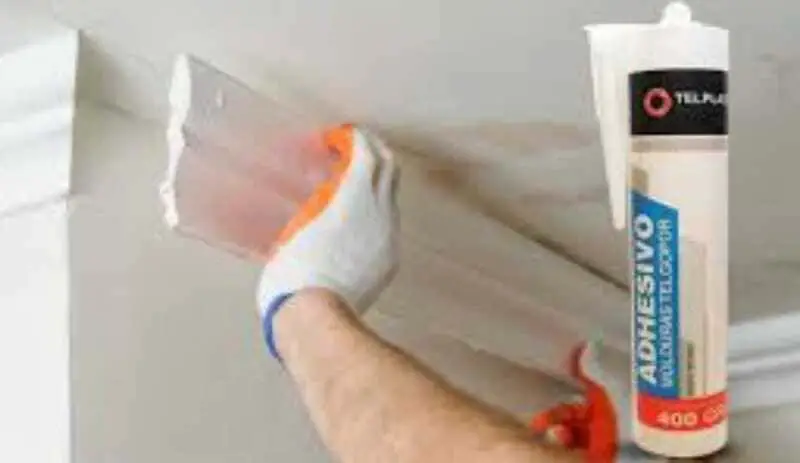
Finally, before beginning the installation of the cornice, it is important to prepare the glue according to the manufacturer’s instructions. The glue should be applied evenly to the back of the cornice and along the surface of the wall or ceiling where the cornice will be placed.
How to cut and fit the cornice pieces.
Once you have planned and prepared the surface for the cornice installation, it is important to know how to cut and fit the cornice pieces to fit perfectly at the corners and ends.
A miter saw or handsaw can be used to cut the cornice pieces. It is important to carefully measure the length of the piece before making any cuts. It is always best to cut the piece a little longer than necessary and then trim it gradually until it fits perfectly.
Once the cornice pieces have been cut, it is important to adjust them to fit perfectly at the corners and ends. For inside corners, a 45-degree angle should be cut on each piece of cornice to fit perfectly into the corner. For outside corners, two 45-degree angles should be cut into each cornice piece.
To fit the cornice pieces at the ends, sandpaper or a file can be used to shape the piece until it fits perfectly. It is important to make sure the piece fits perfectly before gluing it in place.
Once all the cornice pieces have been cut and fitted, they can be glued in place with cornice glue. It is important to make sure that the glue is evenly applied to the back of the piece and the surface of the wall or ceiling before gluing it in place.
Installing the cornice on the wall or ceiling.
Once the walls or ceiling have been prepared and the cornice pieces have been cut and fitted, it’s time to start installing the cornice. Installing the cornice can be a delicate process, but with the right tools and materials, it is easy to do.
Before you begin, it’s important to have everything you need on hand, including cornice glue, tape measure, leveling tool and a pencil. Make sure you also have a helper, especially if the cornice is long or heavy.
Start by applying the glue to the back of the first piece of cornice. Make sure the glue is evenly distributed on the back and edges. Then, place the piece in the corner and press firmly to adhere it to the wall or ceiling.
Next, place the second piece of cornice on the opposite corner. Adjust the piece to fit snugly into the corner and press firmly into place. If necessary, use the leveler to make sure the pieces are level and adjusted properly.
Continue installing the cornice pieces along the wall or ceiling, applying glue and adjusting each piece to fit snugly in place. If necessary, trim and adjust the pieces as you go along.
Once all the cornice pieces have been installed, allow the glue to dry for at least 24 hours before painting or decorating the cornice. It is important to make sure the glue has dried completely before touching or handling the cornice.
How to secure and fasten the cornice in place.
Once all the cornice pieces have been installed and the glue has dried, it is important to secure and fasten the cornice in place to prevent it from coming loose or falling off.
To do this, start by applying a small amount of glue along the top of the cornice. Then, place strips of tape along the cornice to hold it in place while the glue dries.
In addition to glue and tape, nails or screws can be used to secure the cornice in place. However, it is important to be careful when doing so to avoid damaging the cornice or the wall.
If you choose to use nails or screws, be sure to do so in places where the cornice is reinforced with wood or some other strong material. Use a nail gun or drill to drive the nails or screws and make sure they are securely fastened in place.
Once the cornice is secured and fastened in place, remove the tape and any excess glue that may have been left behind. Next, go over the cornice to make sure it is securely fastened and that there is no movement or loose parts.
Finishing and painting the cornice.
Once the cornice is installed and secured in place, it’s time to properly finish and paint it to match the home’s décor.
First, sand the surface of the cornice with fine-grit sandpaper to remove any imperfections or excess glue that may have been left behind. Make sure the surface is smooth and free of any irregularities before you begin painting.
Next, apply a coat of primer to the cornice. The primer will help the paint adhere better to the surface and prevent the wood from absorbing too much paint.
Once the primer has dried completely, apply two or three coats of paint to the cornice, allowing each coat to dry completely before applying the next coat. Choose a color that complements the home’s décor and be sure to apply the paint evenly.
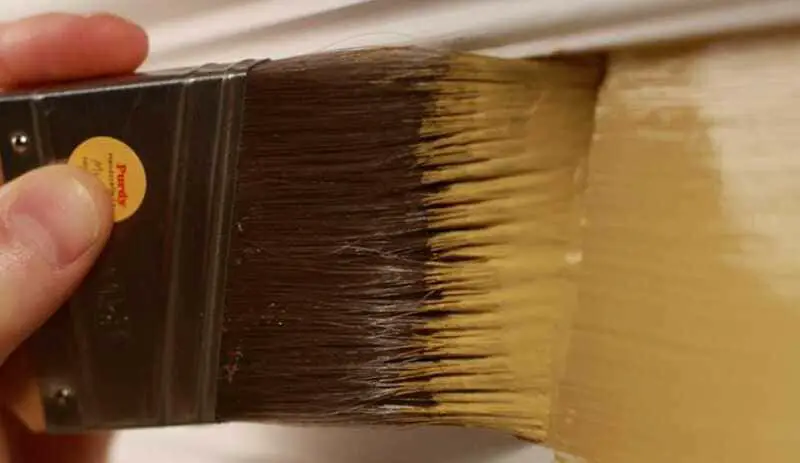
If the cornice is made of polyurethane or some other similar material, it will not be necessary to apply primer. In this case, simply apply the paint directly to the surface after sanding the cornice to smooth out any imperfections.
Once the paint has dried completely, check the cornice to make sure it is well painted and that there are no unpainted or unevenly painted areas. If necessary, apply an additional coat of paint to ensure that the cornice has a uniform and attractive finish.